
Deploying A Static Site To Aws S3
Cool, you want to host a static site on an AWS S3 bucket. You, my friend, came to the right place. One quick note: As with every “how-to post” I try to keep it bare bones - here is the stuff you need, here are some steps, and use stuff and steps in conjunction to accomplish some goal. HOWEVER, as with any tutorial, there are multiple rabbit holes one can mindlessly tumble down. So, please do not mistake this for a complete analysis of every moving part - especially when it relates to AWS(because holy sh*t the rabbit holes never end); Bucket policies, CORS, versioning, object lambda, tiering, batch operations, processing, AMS, etc. All these topics deserve posts of their own, but I am just one person.
Without further ado, let us get started.
My assumptions: (1) You have an AWS Account, (2) You are not in the root account(meaning you have set up a user and group and assigned a policy), (3) MFA enabled(see, I care), (4) You are using the AWS management console, not the CLI, not the SDK, not the Access API.
If any of these do not apply to you, start here.
1 - Creating A Bucket:
1.1: On your AWS Management Console, use the search to navigate to S3
You are in the right place if you see something like this:
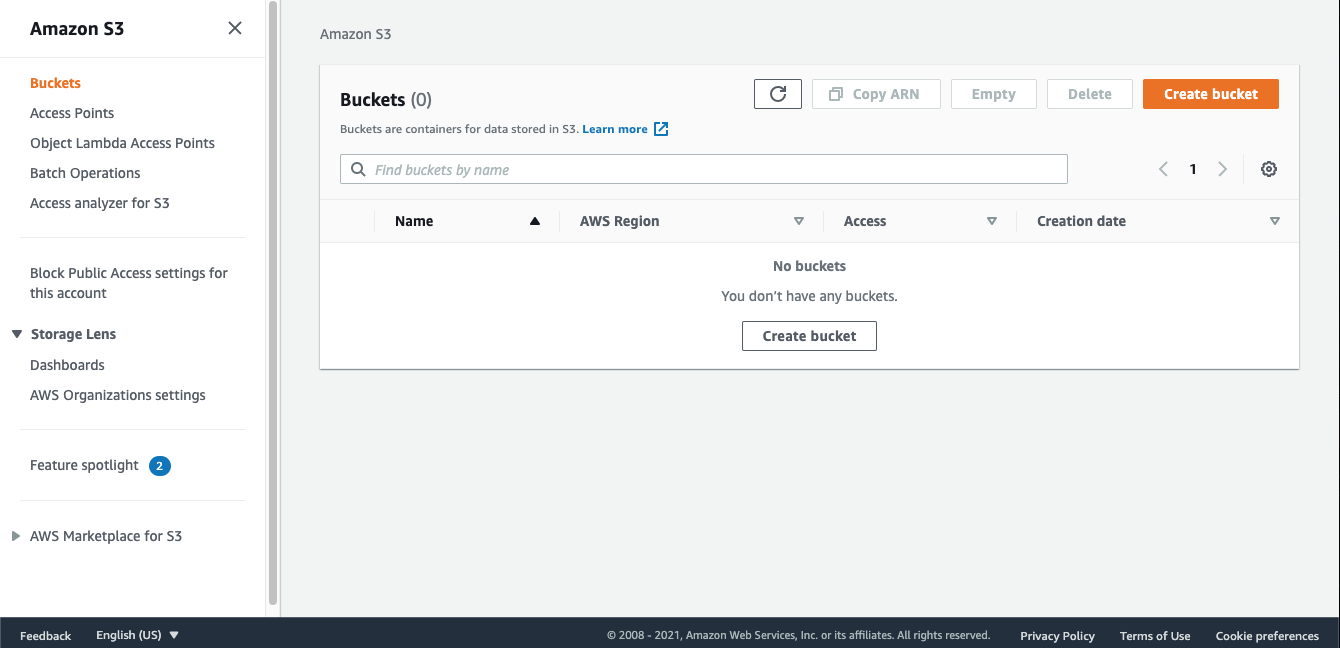
1.2: In the top right corner or middle of the screen, tap Create Bucket
1.3: Choose a bucket name and region. Note here: Names for buckets must be globally unique, so just your name or favorite color probably will not work. Note too that bucket names must: be between 3 and 63 characters long, can consist only of lowercase letters, numbers, dots (.), and hyphens (-), must begin and end with a letter or number, and must not be formatted as an IP address. Also, choose a region close to you(most likely the one it recommends). This is not of much import, but my bucket name is ethans-blog -bucket and I have it hosted in us-east-1.
1.4: Uncheck Block all Public Access. S3 Buckets, by default, block all public access, but we are trying to create a publicly available static site. Check the box stating: I acknowledge that the current settings might result in this bucket and the objects within becoming public.
1.5: Keep Bucket Versioning Disabled, but read about how helpful it is here.
1.6: Enable Default Server Side Encryption and select Amazon S3 key (SSE-S3) for your encryption key and then read about it here.
1.7: Click Create Bucket.
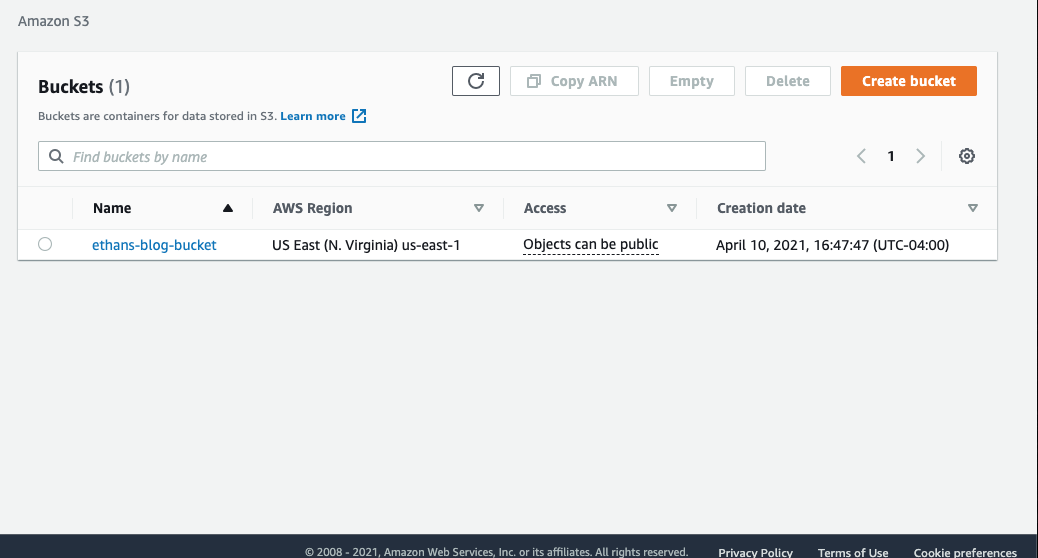
If everything went well, your screen should look like:

Sorry….in reality, it should look like this:
2 - Turning The Bucket Into A Static Site
2.1: Select your bucket. This will take you to the configuration page for the created bucket. Options include Objects, Properties, Permissions, Metrics, Management, and Access Points.
2.2: Select Properties and Scroll all the way down to Static website hosting. Then, edit it, enable static website hosting, and save the changes.
2.3: Under Hosting type, select Host a static website. Next, specify your index and error documents. Insert Index.html in the index document field and error.html in the error document field. These documents will be created later, I promise. Finally, save the changes.
2.4: Scroll down and copy the HTTP link to your bucket and paste it into a browser.
2.5: Don’t Panic. You should be getting a 403 Forbidden Error because you have not yet generated a bucket policy.
3 - Generating A Bucket Policy:
3.1: Go to the bucket configuration permissions tab in the AWS management console, scroll down to Bucket Policy, and select edit.
3.2: Copy your Bucket ARN and then tap on Policy Generator. You should be here:
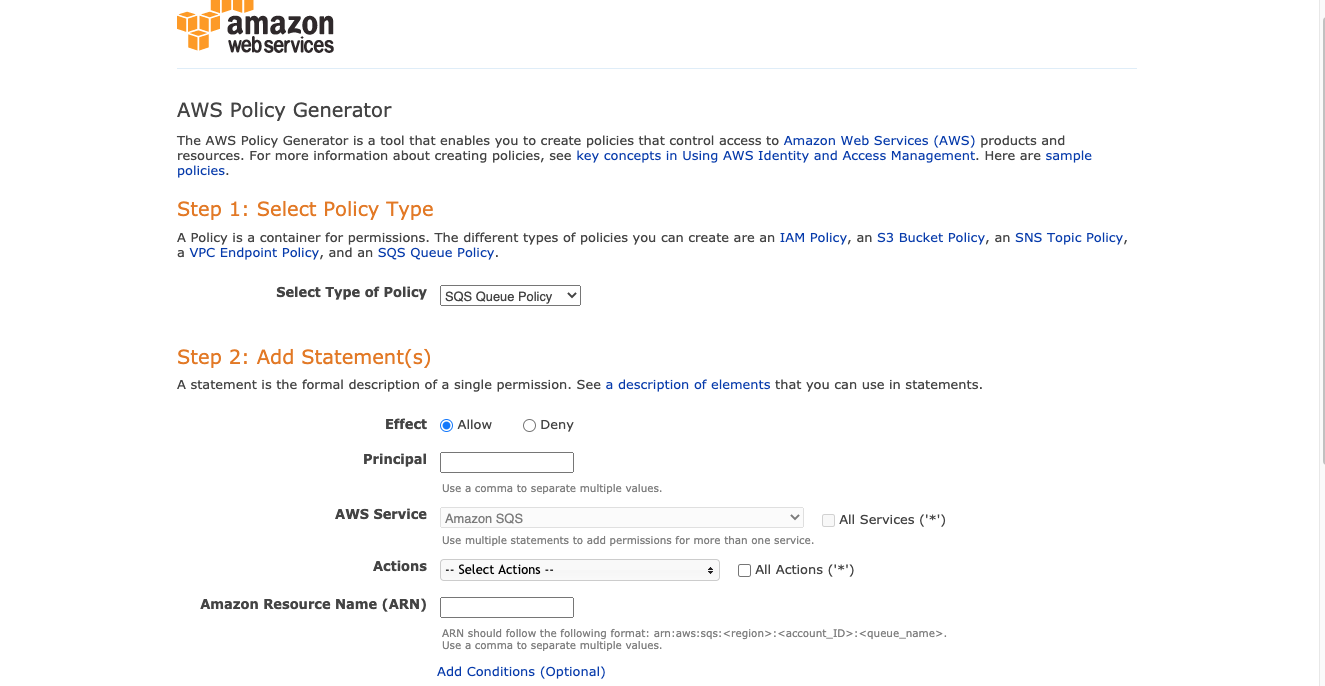
3.3: Fill out the fields with the following information.
Select Type of Policy: S3 Bucket Policy
Effect: Allow
Principal: *
Actions: GetObject
Amazon Resource Name(ARN): Paste YOUR ARN copied from the other page here with /* at the end
My Amazon Resource Name field, for example, is populated with: arn:aws:s3:::ethans-blog-bucket/*
The bucket policy will NOT WORK if you do not add \/* to the end of your ARN
The policy we just created means, in essence, that anyone can do a get object on any object that resides within this bucket. So, DO! NOT! Upload any confidential documents to this bucket!
3.4: Select Add Statement, Generate Policy, then copy the JSON Generated Policy.
Your policy should look pretty close to this:
{
    "Version": "2012-10-17",
    "Id": "Policy1618090327958",
    "Statement": [
        {
            "Sid": "Stmt1618090323301",
            "Effect": "Allow",
            "Principal": "*",
            "Action": "s3:GetObject",
            "Resource": "arn:aws:s3:::ethans-blog-bucket/*"
        }
    ]
}
3.5: COOL! Head back to the AWS Management Console and paste the bucket policy section. Save the changes.
4 - Creating Index.html and Error.html and Uploading Them To The Bucket
4.1: On your Desktop, create a file named index.html and error.html. Note: Make sure the file is plain text and has the .html ending. 4.2: Copy this into your index.html:
<!DOCTYPE html>
<html lang="en">
  <head>
    <title>My Bucket</title>
    <meta content="text/html; charset=utf-8" />
  </head>
  <body>
  	<h1> Hello, World! Welcome to my bucket!!!! </h1>
  </body>
</html>
Save it!
4.3: Copy this into your error.html:
<h1>Uh oh, there is a crack in this bucket</h1>
Save it!
4.4: Now, we want to upload those to the bucket. On your main bucket configuration page, select upload, add files, and finally select the index.html and error.html files you just created(from wherever you saved them).
4.5: In the bottom right corner, press Upload. Give it a second to upload, then confirm your screen looks somewhat like this: upload
4.6: Close that, navigate to the properties tab, scroll down and try under static website hosting again. 4.7: YAY!
Next Steps: Whatever you want! You can add photos to the bucket and reference them in the index HTML, upload your resume to share with potential employers, implement CORS, etc. Go forth and conquer.
Please feel free to contact me with any questions or comments!