
Part One Of Building A Motion Detector With Raspberry Pi 3 And Aws
Welcome to part one of building a motion detector with RaspberryPi, AWS IOT Core, and AWS SNS.
Before we get started, let’s make sure we have the right tools.
Materials Required for this tutorial:
- Inland PIR Sensor
- RaspberryPi Model 3b+
- 20cm Jumper Wires(Female to Female)
- MicroSD card and Adapter
- Mac or Linux OS
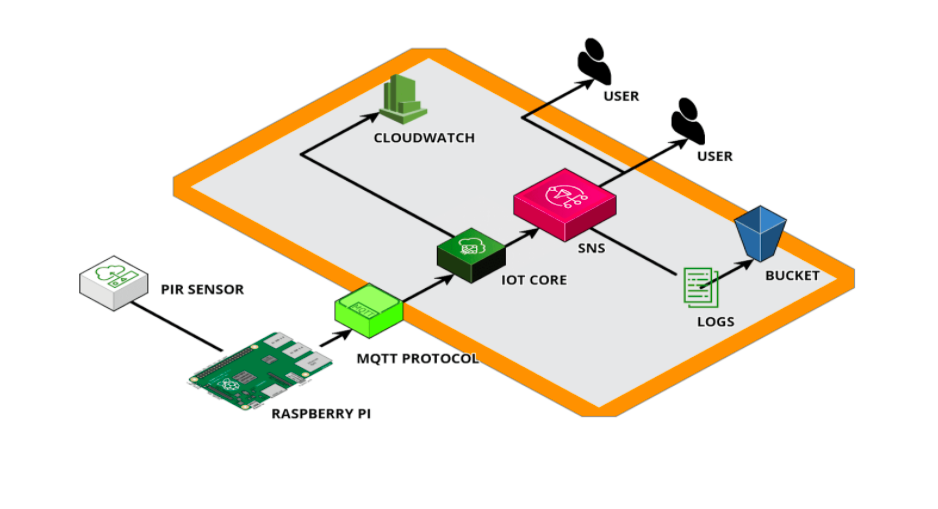
Today we are going to be focusing on the pir sensor + raspberry pi parts of this diagram:
1 - Getting Started:
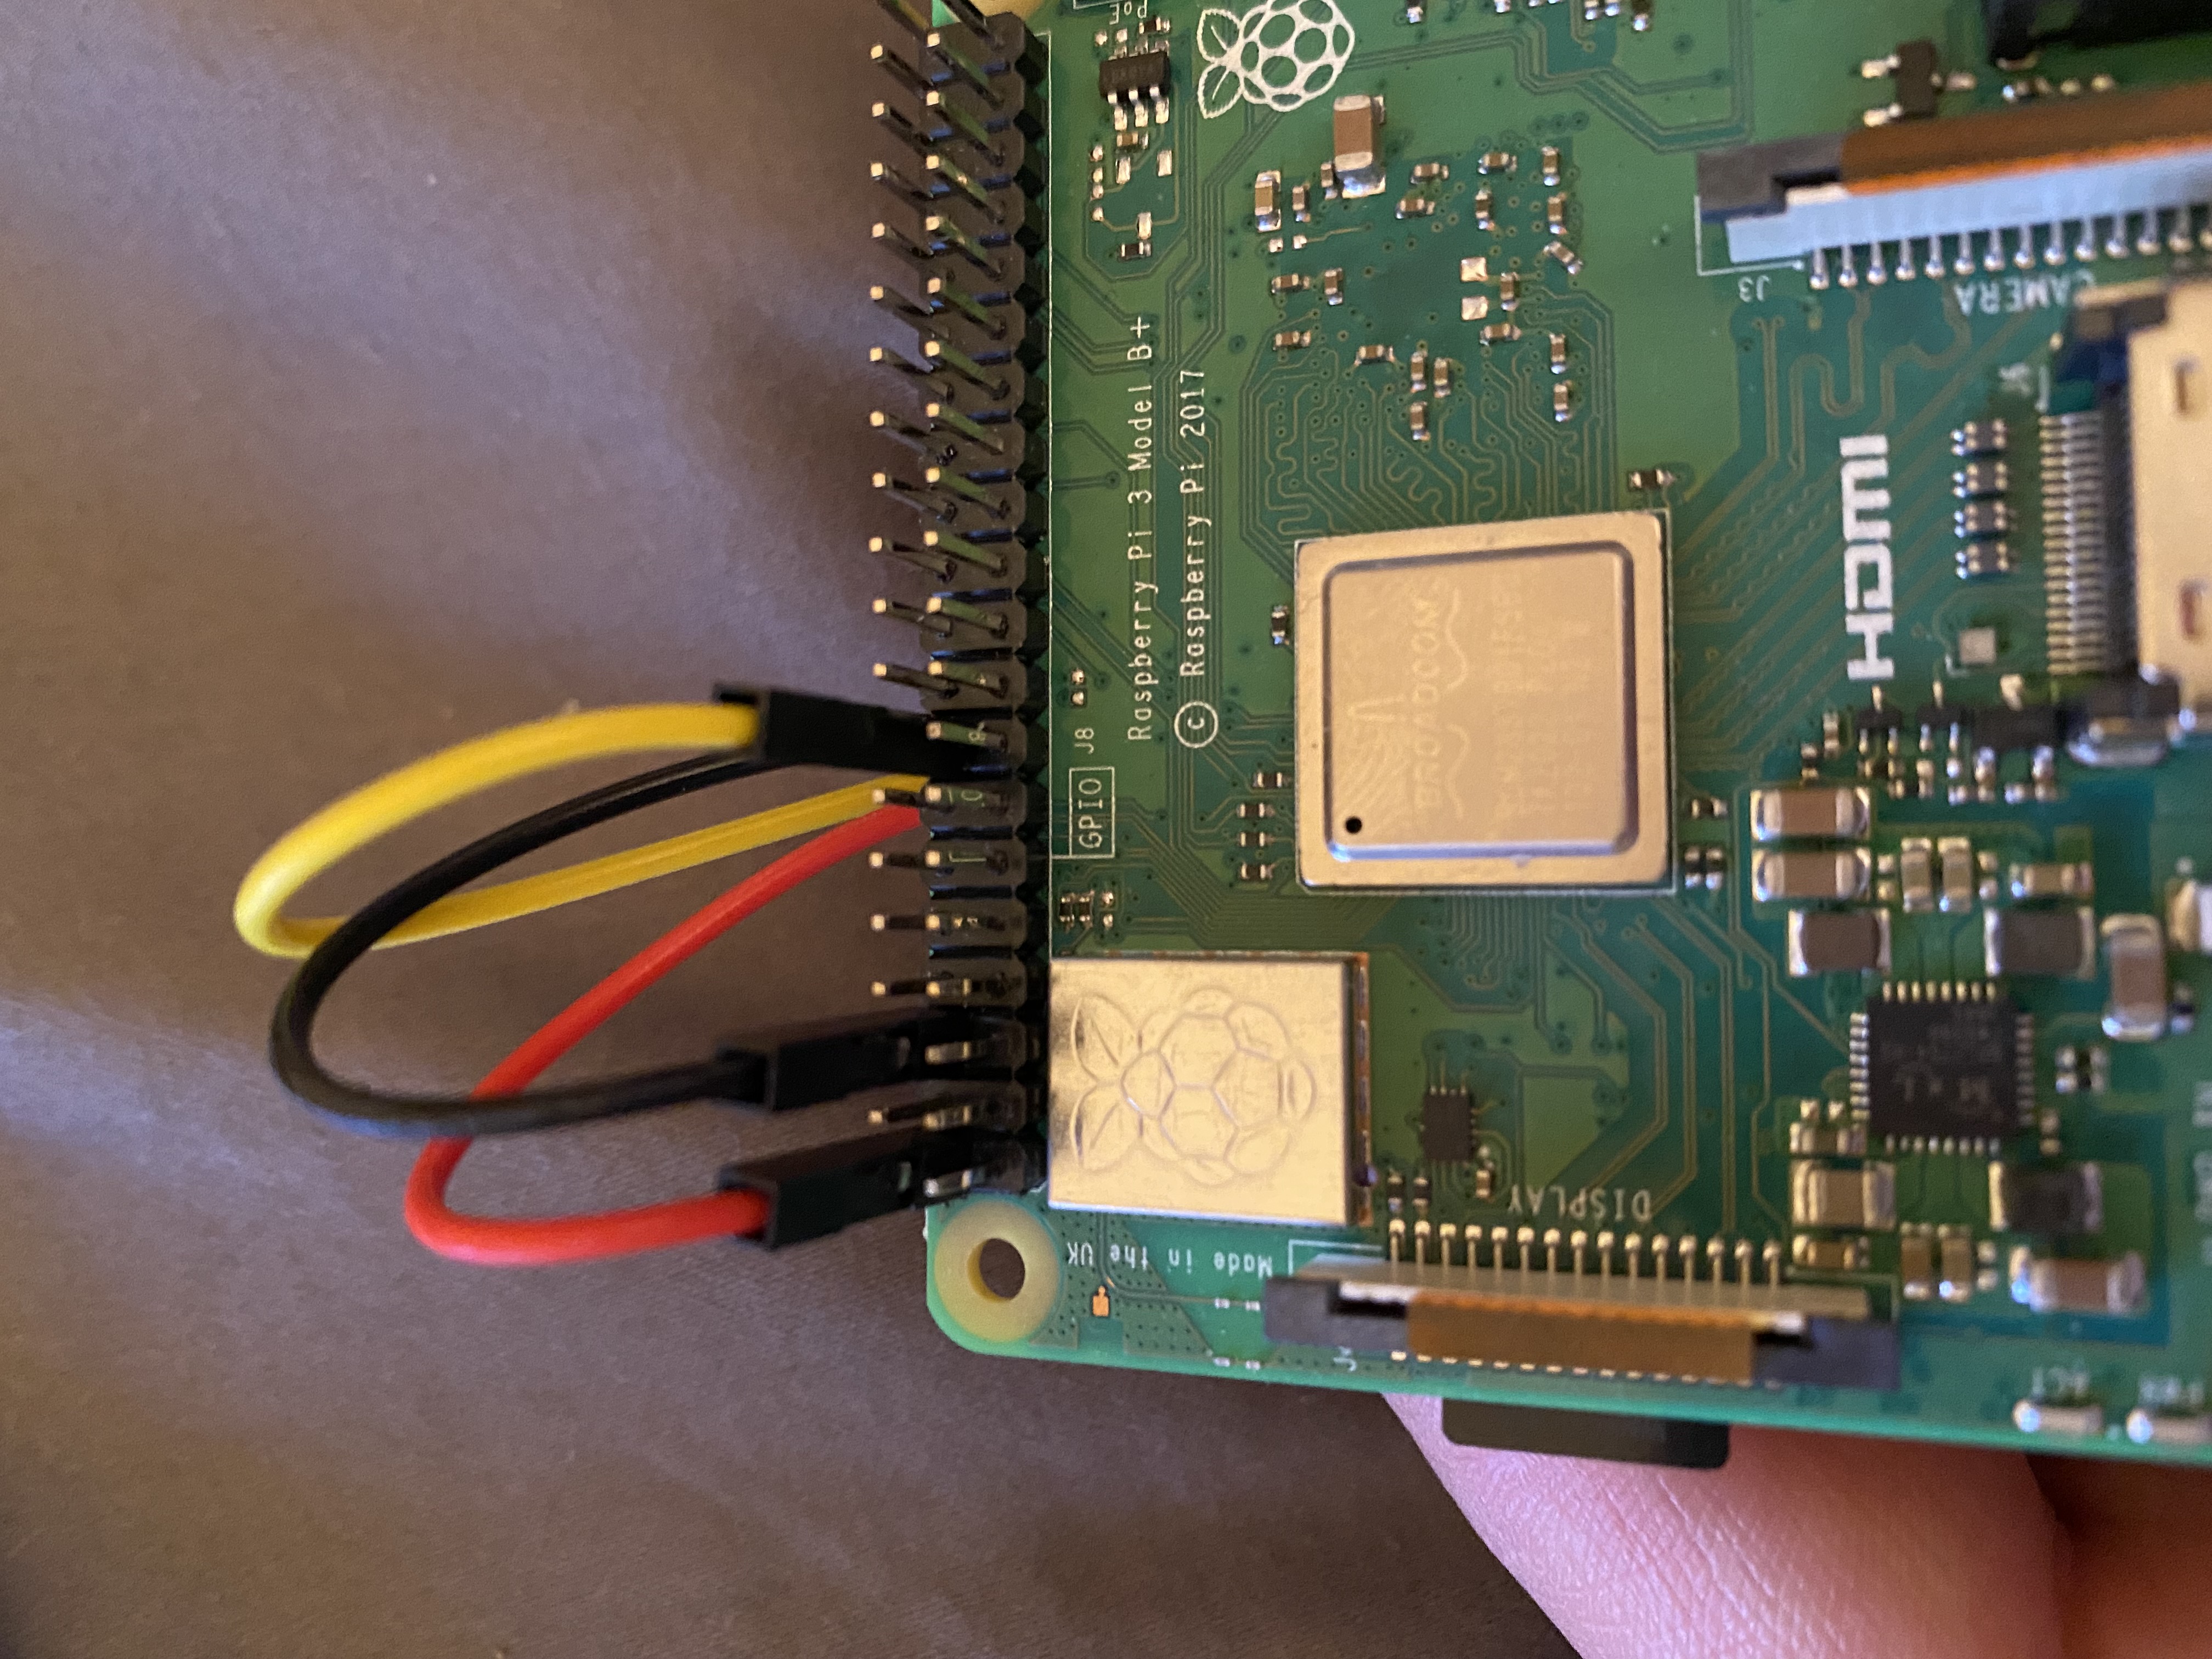
1.0: Connect the Pir Sensor to you raspberry pi with the jumper wires, like this:

1.1: Then, download Raspberry PI Imager here
1.2: Put your MicroSD adapter with the MicroSD inserted into your computer
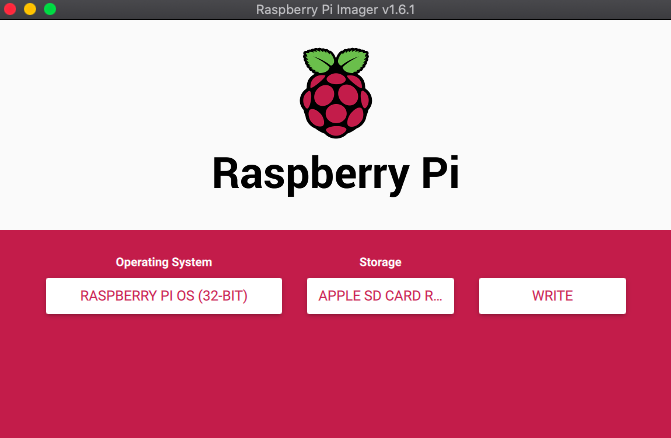
1.3: Open Raspberry PI Imager and choose the following: Operating System: Raspberry PI OS(32 BIT) Storage: The name of your SD card Your screen should look like this:
1.4: Press write and give it a few minutes to write the operating system to the SD card
2 - Enabling SSH and adding network info + video tutorial of this step for those who do not want to read anymore:
2.1: SSH is no longer enabled by default on RaspberryPi, but there is an easy way to make sure that it is enabled automatically on boot by creating an empty ssh file in the root directory of the boot volume. So, let’s do that.
2.2: Open the command line on your computer and type the following command:
touch /Volumes/boot/ssh
2.3: Verify that the empty file was created with the following commands
cd /Volumes/boot
ls
2.4: Now, in the boot directory, we need to create a file named wpa_supplicant.conf. Do this by running the following command which will open up a text editor on your command line(you can, of course, choose whichever text editor you like the most.
sudo vim wpa_supplicant.conf
2.5: Press ‘i’ on your keyboard to start typing and then write the following:
ctrl_interface=DIR=/var/run/wpa_supplicant GROUP=netdev
update_config=1
country=US

network={
    ssid="NETWORK-NAME"
    psk="NETWORK-PASSWORD"
}
Change the country code to meet your specific situation. Next, insert your network name and password in the SSID and PSK fields, respectively. These can usually be found on your networks router.
2.6: Once you have finished writing your wpa_supplicant.conf file, press esc, and then :wq to get out of vim. wq stands for “write and then quit”, which is perfect because that is exactly what we want to do.
3 - Booting the Pi
3.1: Eject your BOOT Volume by right-clicking on the volume in finder and pressing eject. Now, pull the microSD card out and put it into your raspberry pi.
3.2: With the microSD card inserted, plug your raspberry pi in.
3.3: Wait. The raspberry pi can take a while to boot. Sometimes this can take as long as five minutes. So, take a breather, we have gotten a lot done!
4 - Logging in:
4.1: Great, you gave the raspberry pi some time to get itself together and now want to login. Easy peasy. Run this command to get in:
ssh pi@raspberry.local
If you are having issues, try to run the command again. Still running into problems? Check out the troubleshooting documents
4.2: Hit enter when a warning is displayed which will add the raspberry pi to the list of known hosts.
4.3: Then enter the password: raspberry
5 - Changing some things around:
5.1: The device is not that secure right now. One way to fix that is by changing your hostname and password. So, let’s get at it.
5.2: While connected to the raspberry pi via SSH, run this command:
sudo raspi-config
5.3: If that went well, your screen should look like this:
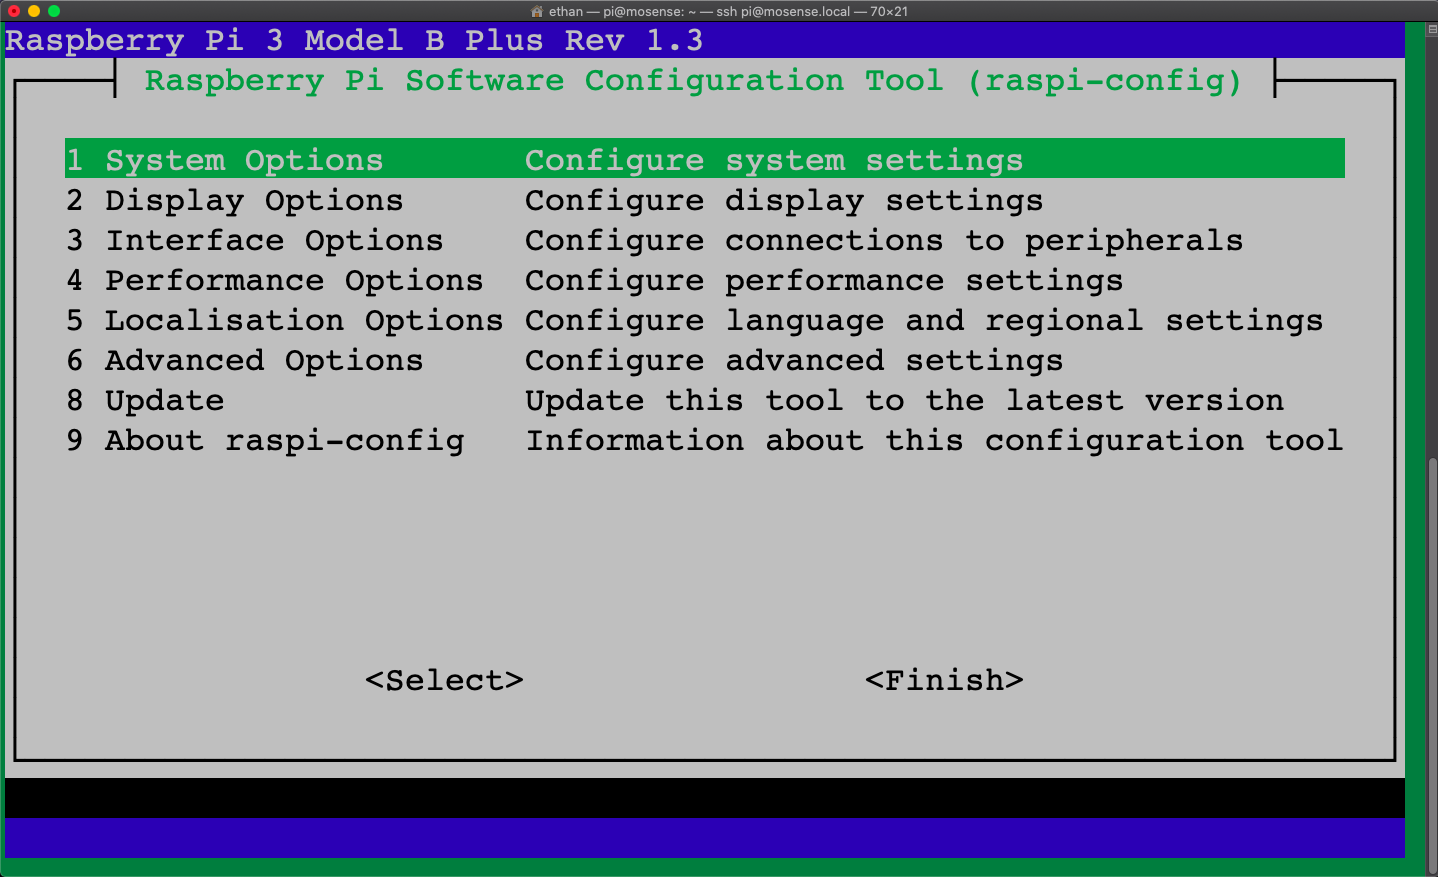
5.4: Now, select system options and edit options s3 and s4. Where the latter is your hostname and the former is your password for the user pi. Make sure to remember these!
5.5: Go back into the settings by running:
sudo raspi-config
5.6: Select ‘Internationalization options’.
5.7: Click ‘Change Timezone’ and finish.
5.8: Then, reboot the raspberry pi.
5.9: Finally, sign back into your raspberry pi with the changes.
ssh pi@newhostname.local
Where ‘newhostname’ is the one you set in 5.4. Then, enter the password you set in 5.4.
5.10: Lastly, update your raspberry pi by running.
sudo apt-get update -y
sudo apt-get upgrade -y
5.11: Pat yourself on the back! You completed part one!
Find part two here.